How MaiMai DX Judges Slides
May 24, 2023•1,686 words
I was asked to briefly explain how MaiMai DX judges slides. This is originally a part of a longer write-up on MaiMai's game mechanics but I figured I should just release them part by part as they're ready. Hope you enjoy!
MaiMai's slide notes is one of the game mechanics that sets it apart from other rhythm games. Having slides makes the hand movements dynamic and easy to signal to the player when to move their hands across the screen. Due to cab's touchscreen not being a traditional capacitive touchscreen you might have on a laptop or tablet, the game has a different way of judging a slide's execution.
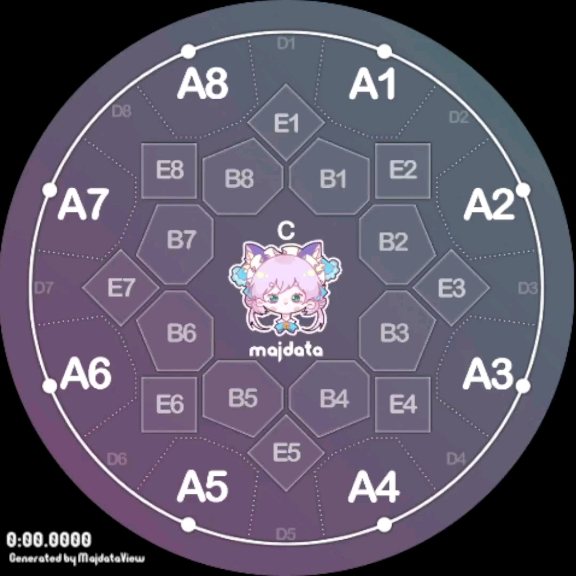
Before diving more on how slide notes are judged, let's briefly discuss how MaiMai's touchscreen work. Like what was said previously, the touchscreen isn't your typical precise laptop or smartphone touchscreen. The amount of zones for a dx touchscreen can detect are 34 (Four sections with 8 zones each and C section with 2 zones).
Imagine a slow slide note that ends at zone A4. We want to make sure that we have enough leeway in judgement such that the game judges these two scenarios as the same:
- A player is closely tracing the star and activates zone A4 when the star reaches the edge of zone A4, and
- A player only activates A4 when the star is already in the final touch zone
Two things are needed to solve this:
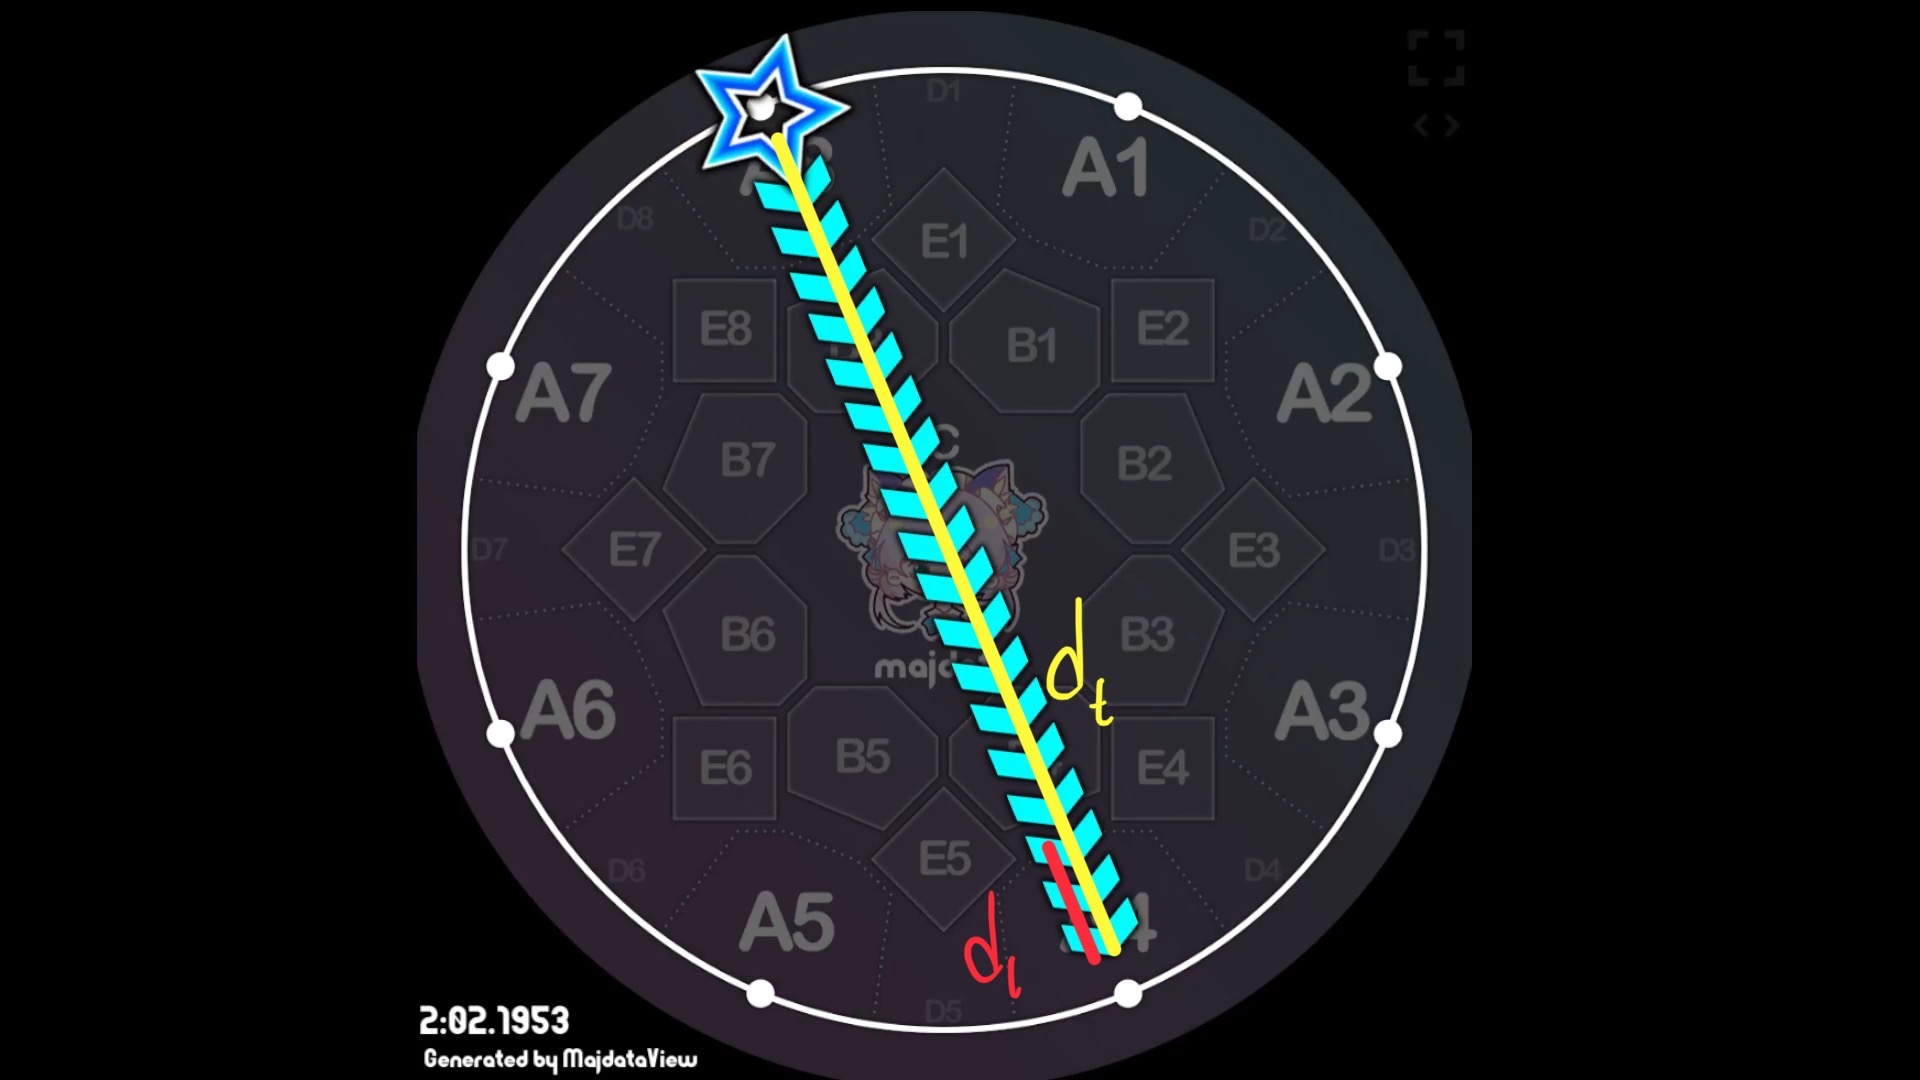
- The active duration of the slide note (the total time the slide spends moving)
- The proportion of the slide's distance on the last zone to the slide's total distance
In essence we are trying to get the duration that the star is on the final zone then we add it to the timing windows we have. For MaiMai DX's case this extra leeway only happens with critical perfect's window. For distances, we can just do a rough estimation using whatever graphics editing software you prefer. Included in the appendix is a simple arcade-accurate lookup table I created for everyone's reference.
We'll be using MaiMai's slide timing windows from my previous blog post about GekiChuMai's timing windows.
| F Good | F Great Low | F Great Mid | F Great High | F Perfect Low | F Perfect High | Critical Perfect | S Perfect High | S Perfect Low | S Great High | S Great Mid | S Great Low | S Good |
|---|---|---|---|---|---|---|---|---|---|---|---|---|
| (-∞, -433.33) | [-433.33, -366.67) | [-366.67, -300) | [-300, -233.33) | [-233.33, 233.33] | (233.33, 266.67] | (266.67, 366.67] | (366.67, 433.33] | (433.33, 600] |
The total allowance, delta, that MaiMai gives for slide judgement is as follows:
where ta is the slide's active duration, dl is the distance of the slide on the last touch zone, and dt is the total distance a slide travels. We can simplify the computation by using a table available in the appendix below.
The critical perfect window then becomes:

If a player's timing is outside this, then we continue to compare to other timing windows without any modification. Note that because of this added allowance, some timing windows can get skipped.
Examples
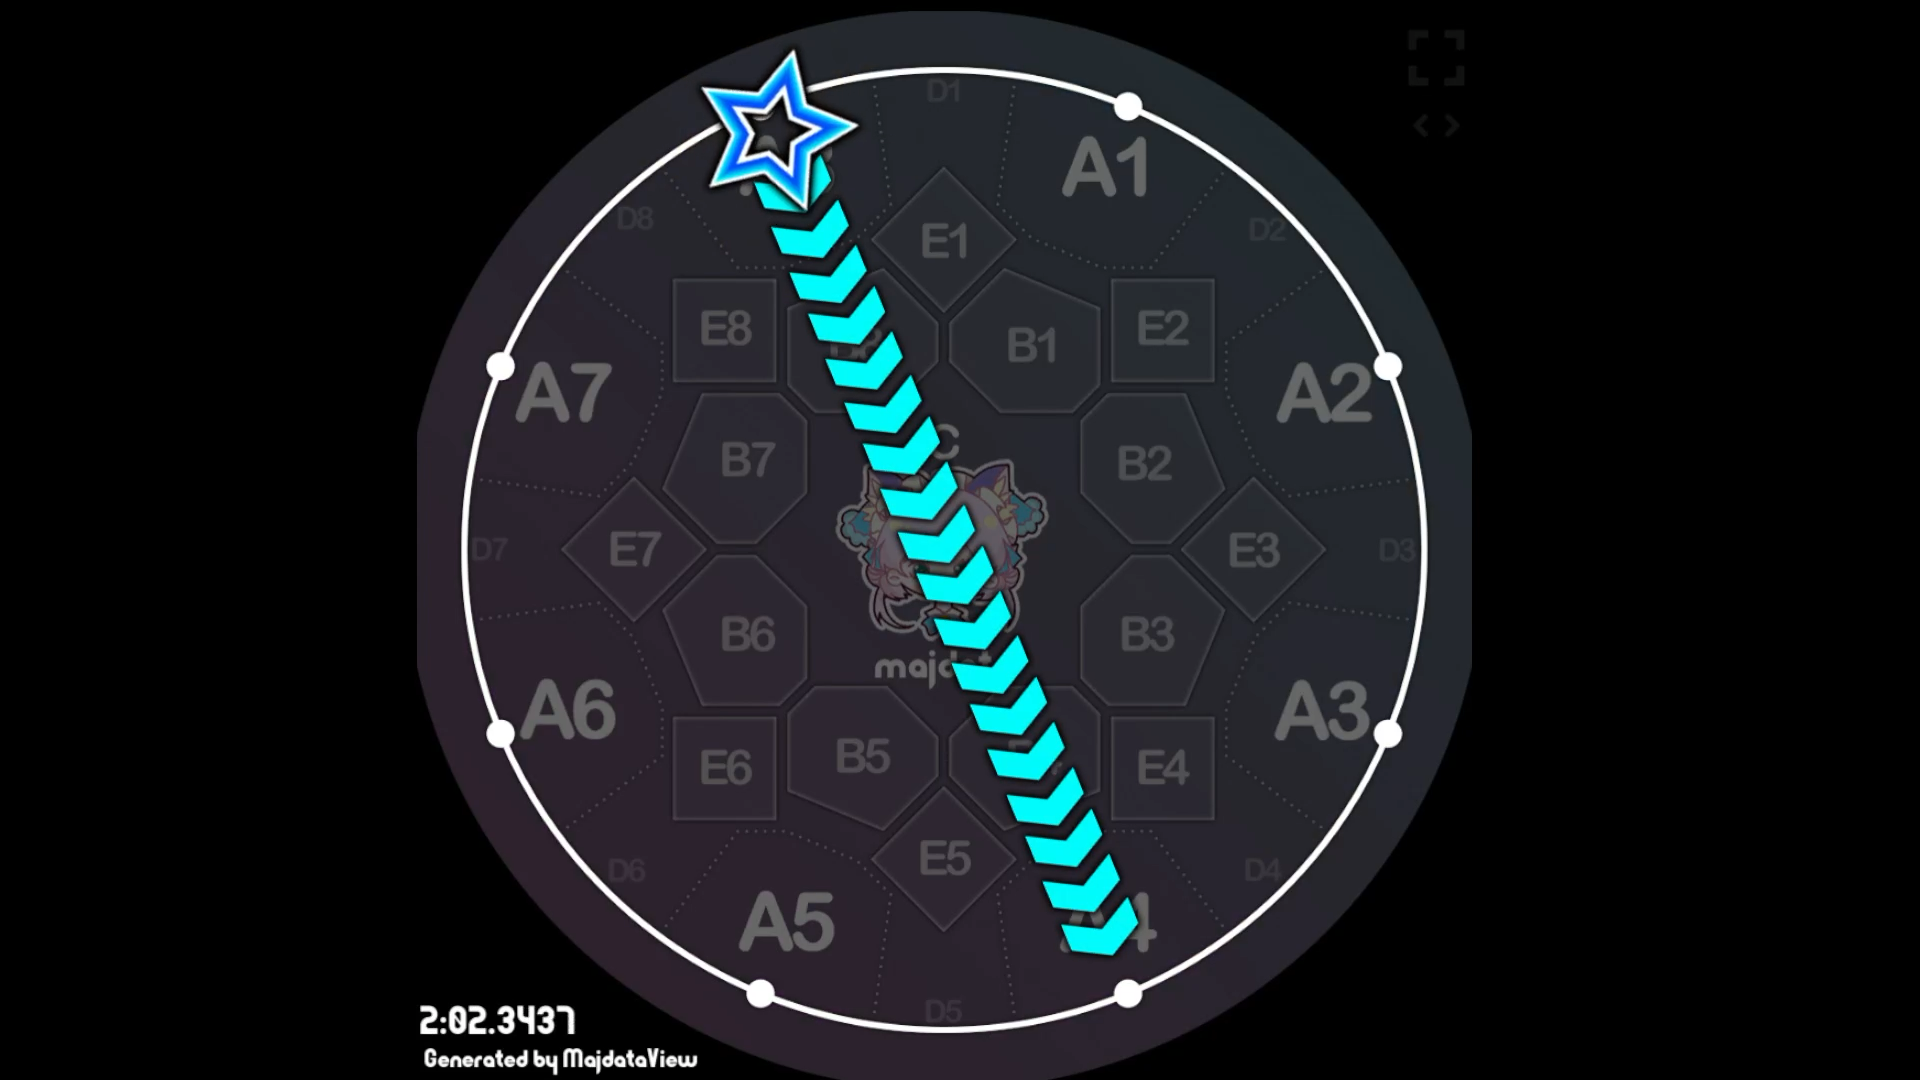
Now let's do two sample slides: 1>4 and 8-4
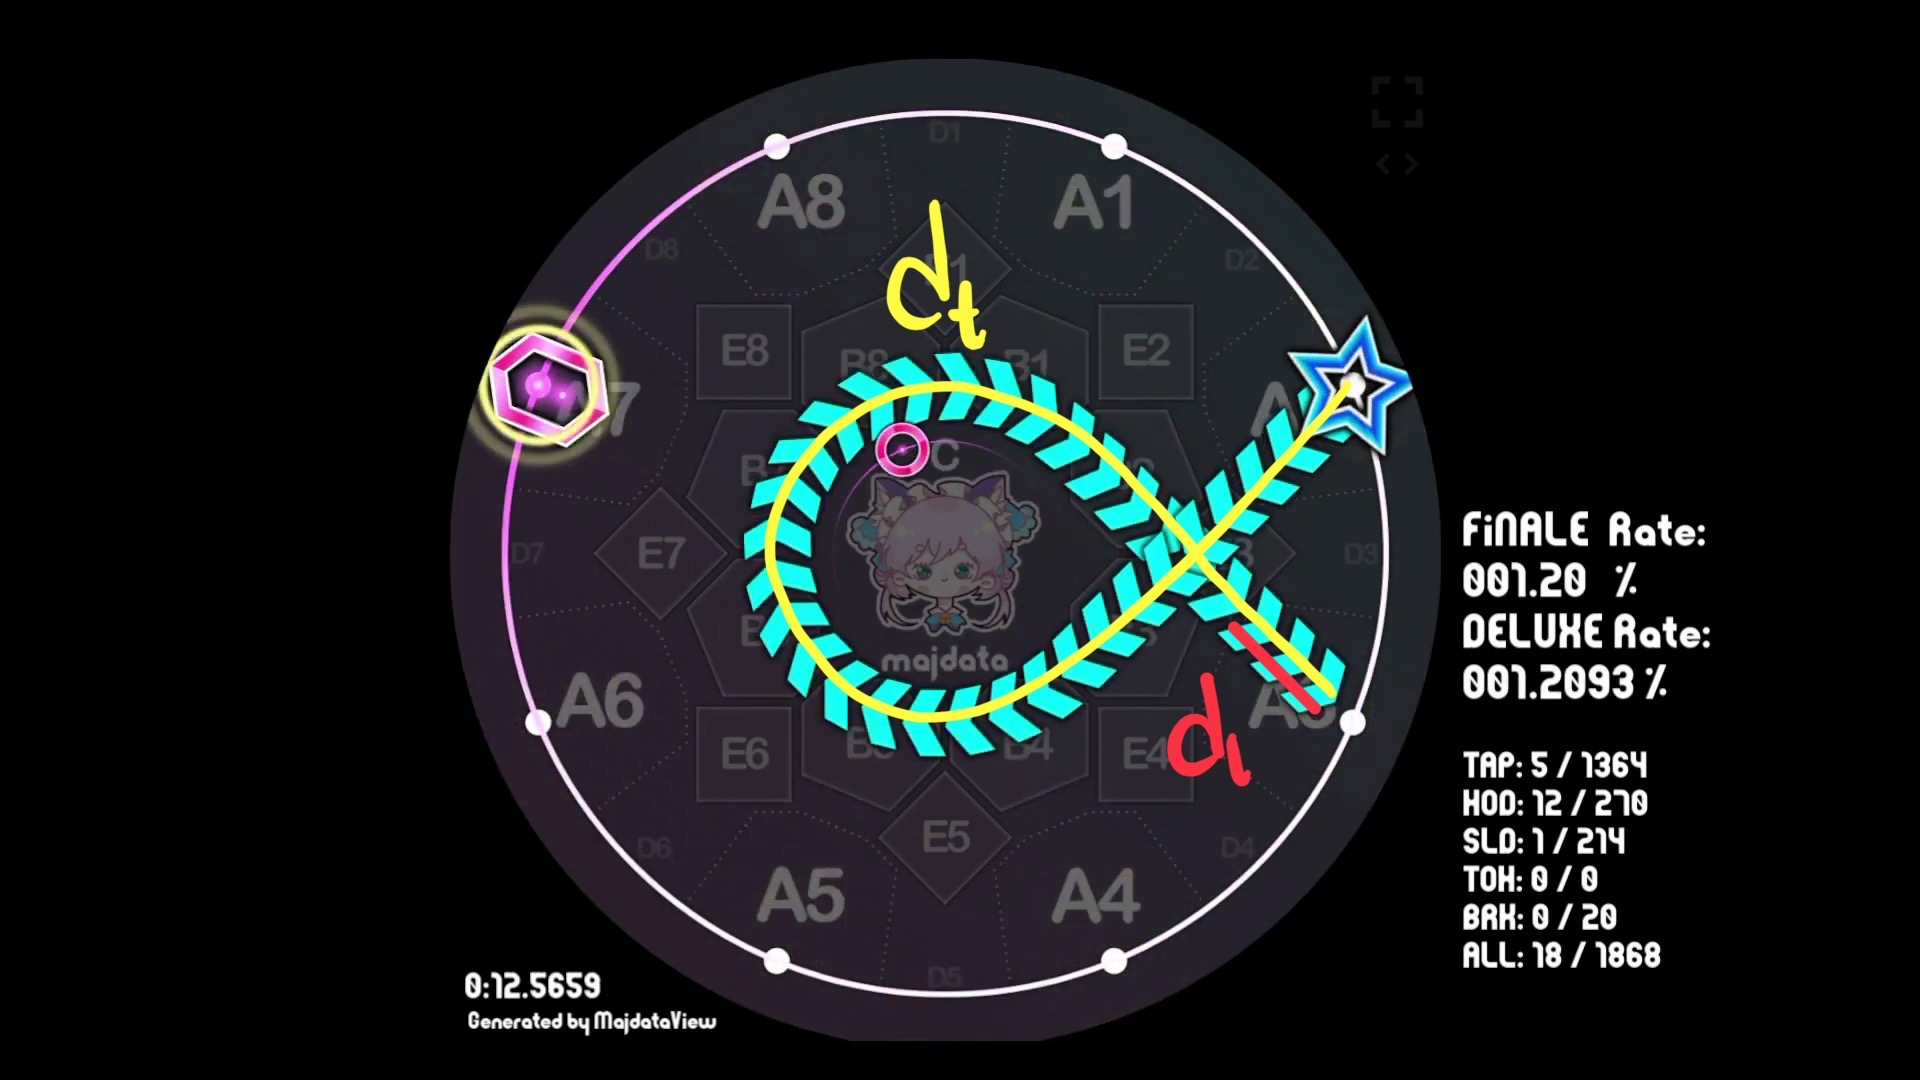
1>4

Let's assume that this slide has an active duration of 2 seconds. This slide variant is a Circumference clockwise slide with a distance of 3 places. In the precomputed table, the corresponding last zone distance to total distance is 0.1551.
Our total leeway would be
Meaning the slide's critical perfect window would be
From [-233.33 ms, 233.33 ms] to [-310.8 ms, 310.8 ms]. Our critical perfect window now completely overlaps great high and partly overlaps great mid's timing windows. Meaning we start comparing straight to great mid's timing window if player is still outside the new critical perfect window.
8-4
For the next slide, let's assume an active duration of 0.5 seconds. This slide variant is a straight slide with a distance of 4 places. Again, consulting the table we get 0.1629.
Our total leeway would be
Meaning the slide's critical perfect window would be
From [-233.33 ms, 233.33 ms] to [-253.68 ms, 253.68 ms]. It overlaps with great high's timing windows but not all of it.
Conclusion
Due to the arcade cab's unconventional touchscreen, the game adds extra allowance to slides depending on how long the star stays on the last touch zone. Hopefully you learned how the computation works. Thanks for reading all the way! Stay tuned to future posts about MaiMai, Chunithm, Ongeki, and my other personal projects I'm making.
Appendix
Last zone to total distance proportion table
Distance is in terms of places from starting button to target button in a clockwise manner (e.g. Button 1 to button 2 has distance of 1, button 1 to button 8 has distance of 7). Empty cells means such slides are impossible.
| Slide variant | Dis. 0/8 | Dis. 1 | Dis. 2 | Dis. 3 | Dis. 4 | Dis. 5 | Dis. 6 | Dis 7 |
|---|---|---|---|---|---|---|---|---|
| Straight Line (-) | 0.1920 | 0.1793 | 0.1629 | 0.1793 | 0.1920 | |||
| Circumference CW (<, >, ^) | 0.0582 | 0.4653 | 0.2326 | 0.1551 | 0.1163 | 0.0931 | 0.0775 | 0.0665 |
| Circumference CCW (<, >, ^) | 0.0582 | 0.0665 | 0.0775 | 0.0931 | 0.1163 | 0.1551 | 0.2326 | 0.4653 |
| Arc along the center CW (p) | 0.0921 | 0.1114 | 0.1247 | 0.1436 | 0.1693 | 0.0752 | 0.0817 | 0.0840 |
| Arc along the center CCW (q) | 0.0921 | 0.0840 | 0.0817 | 0.0752 | 0.1693 | 0.1436 | 0.1247 | 0.1114 |
| Zigzag (s, z) | 0.1055 | |||||||
| Start to center to end (v) | 0.1629 | 0.1629 | 0.1629 | 0.1629 | 0.1629 | 0.1629 | ||
| Arc to the side CW (pp) | 0.0734 | 0.0872 | 0.1509 | 0.0698 | 0.0698 | 0.0711 | 0.0811 | 0.0603 |
| Arc to the side CCW (qq) | 0.0734 | 0.0603 | 0.0811 | 0.0711 | 0.0698 | 0.0698 | 0.1509 | 0.0872 |
| Start to two places to end CW (V) | 0.0960 | 0.1018 | 0.0955 | 0.0948 | ||||
| Start to two places to end CCW (V) | 0.0948 | 0.0955 | 0.1018 | 0.0960 | ||||
| Fan left segment (f) | 0.1793 | |||||||
| Fan middle segment (f) | 0.1629 | |||||||
| Fan right segment (f) | 0.1793 |
Slide touch zone sequence table
Bonus information from yours truly. Not needed for slide judgement computation but some people might find the following neat. The data is formatted as follows:
- Commas (,) are used to indicate the order:
A1,B1means A1 first then B1. - Forwardslashes (/) are used to indicate two or more zones that can be activated to complete a step:
A1,B1,C1/C2means A1, then B1, then C1 or C2.
The table only starts at zone A1. Slides in maimai are rotationally symmetrical, meaning you can just rotate a slide to achieve the slide position you want.
| Slide variant | Dis. 0/8 | Dis. 1 | Dis. 2 | Dis. 3 | Dis. 4 | Dis. 5 | Dis. 6 | Dis. 7 |
|---|---|---|---|---|---|---|---|---|
| Straight Line (-) | A1,A2/B2,A3 | A1,B2,B3,A4 | A1,B1,C1/C2,B5,A5 | A1,B8,B7,A6 | A1,A8/B8,A7 | |||
| Circumference CW (<, >, ^) | A1,A2,A3,A4,A5,A6,A7,A8,A1 | A1,A2 | A1,A2,A3 | A1,A2,A3,A4 | A1,A2,A3,A4,A5 | A1,A2,A3,A4,A5,A6 | A1,A2,A3,A4,A5,A6,A7 | A1,A2,A3,A4,A5,A6,A7,A8 |
| Circumference CCW (<, >, ^) | A1,A8,A7,A6,A5,A4,A3,A2,A1 | A1,A8,A7,A6,A5,A4,A3,A2 | A1,A8,A7,A6,A5,A4,A3 | A1,A8,A7,A6,A5,A4 | A1,A8,A7,A6,A5 | A1,A8,A7,A6 | A1,A8,A7 | A1,A8 |
| Arc along the center CW (q) | A1,B2,B3,B4,B5,B6,B7,B8,A1 | A1,B2,B3,B4,B5,B6,B7,B8,B1,A2 | A1,B2,B3,B4,B5,B6,B7,B8,B1,B2,A3 | A1,B2,B3,B4,B5,B6,B7,B8,B1,B2,B3,A4 | A1,B2,B3,B4,A5 | A1,B2,B3,B4,B5,A6 | A1,B2,B3,B4,B5,B6,A7 | A1,B2,B3,B4,B5,B6,B7,A8 |
| Arc along the center CCW (p) | A1,B8,B7,B6,B5,B4,B3,B2,A1 | A1,B8,B7,B6,B5,B4,B3,A2 | A1,B8,B7,B6,B5,B4,A3 | A1,B8,B7,B6,B5,A4 | A1,B8,B7,B6,A5 | A1,B8,B7,B6,B5,B4,B3,B2,B1,B8,B7,A6 | A1,B8,B7,B6,B5,B4,B3,B2,B1,B8,A7 | A1,B8,B7,B6,B5,B4,B3,B2,B1,A8 |
| Zigzag S (s) | A1,B8,B7,C1/C2,B3,B4,A5 | |||||||
| Zigzag Z (z) | A1,B2,B3,C1/C2,B7,B6,A5 | |||||||
| Start to center to end (v) | A1,B1,C1/C2,B2,A2 | A1,B1,C1/C2,B3,A3 | A1,B1,C1/C2,B4,A4 | A1,B1,C1/C2,B6,A6 | A1,B1,C1/C2,B7,A7 | A1,B1,C1/C2,B8,A8 | ||
| Arc to the side CW (pp) | A1,B1,C1/C2,B6,A7,A8,A1 | A1,B1,C1/C2,B6,A7,A8,A1/B1,A2 | A1,B1,C1/C2,B6,A7,A8,B1,B2,A3 | A1,B1,C1/C2,B6,A7,A8,B1,B2/C1/C2,B3/B4,A4 | A1,B1,C1/C2,B6,A7,A8,B1,C1/C2,B5,A5 | A1,B1,C1/C2,B6,A7,A8,B1,C1/C2,B6,A6 | A1,B1,C1/C2,B6,A7 | A1,B1,C1/C2,B6,A7,A8 |
| Arc to the side CCW (qq) | A1,B1,C1/C2,B4,A3,A2,A1 | A1,B1,C1/C2,B4,A3,A2 | A1,B1,C1/C2,B4,A3 | A1,B1,C1/C2,B4,A3,A2,B1,C1/C2,B4,A4 | A1,B1,C1/C2,B4,A3,A2,B1,C1/C2,B5,A5 | A1,B1,C1/C2,B4,A3,A2,B1,B8/C1/C2,B7/B6,A6 | A1,B1,C1/C2,B4,A3,A2,B1,B8,A7 | A1,B1,C1/C2,B4,A3,A2,A1/B1,A8 |
| Start to two places to end CW (V) | A1,A2/B2,A3,A4/B4,A5 | A1,A2/B2,A3,B4,B5,A6 | A1,A2/B2,A3,B3,C1/C2,B7,A7 | |||||
| Start to two places to end CCW (V) | A1,A8/B8,A7,B8,B1,A2 | A1,A8/B8,A7,B7,C1/C2,B3,A3 | A1,A8/B8,A7,B6,B5,A4 | A1,A8/B8,A7,A6/B6,A5 | ||||
| Fan left segment (f) | A1,B8,B7,A6/D6 | |||||||
| Fan middle segment (f) | A1,B1,C1/C2,B5,A5 | |||||||
| Fan right segment (f) | A1,B2,B3,A4/D5 |