How I Unlocked Xiaomi Qin 2 Pro and Installed Phh GSI
December 31, 2019•3,984 words
For a guide instead of a diary, please click here
Note: This article describes the process of me finding a way to flash custom ROMs onto my Qin 2 Pro phone, and this is not meant to be a comprehensive guide that anyone could do after reading. If you decide to follow this, please make sure you read the entire article and you have sufficient technical knowledge to do so. The unlock and flashing process is more complicated than any Android device I have ever used. I take absolutely no responsibility for bricked or broken phones.
All steps in this article was carried out on firmware version 1.1.0 (China) on Qin 2 Pro. Anything else is not tested.
Edit: Please note that all the below methods are not discovered by me from scratch in any sense; rather, they are pretty much all based on great work done by people at 4PDA. I apologize if it was not clear previously, but I would like to express my great thanks to those people, especially those who somehow retrieved all the necessary files and keys and made the first flashable package on this device. Without their work, I would not have ordered the phone in the first place, let alone trying to run any sort of custom ROMs.
Background
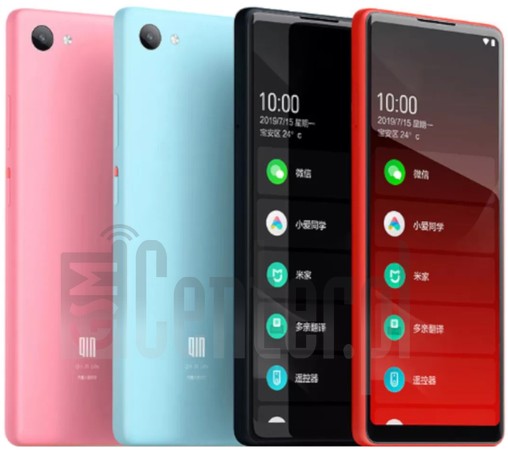
Recently, I got interested in a phone from an unknown branch of Xiaomi, called Qin 2 Pro. This is a phone that stands against the recent trend of smartphones: a small screen, no fancy in-display fingerprint scanning, and even without a front-facing camera, but still with Android 9 preloaded and a gorgeous thin bezel without anything blocking the beuty. You may know that I had a k-touch i9, which is even smaller, but that phone was not really usable as an actual "phone" -- the screen is just too small to operate on. I am really into small ones, but I still want it to be large enough to, for example, type on. The Qin 2 Pro, to me, was very interesting because it's like somebody brought some good old phone to the future and updated it with a modern screen, battery and operating system.
It looks particularly like Xiaomi 2, especially the white variant, which was the device on which I began doing Android development. But even the nostalgia did not overcome the big, big bummer that held me back from placing an order: the bootloader is locked and there is no official way to unlock at all. This all changed when I saw a post on a Chinese forum, which stated that the OP had already unlocked the bootloader successfully. Almost immediately upon seeing that, I placed an order for the phone, hoping that I could now finally run my favorite ROMs on this device.
Unfortunately stupid me forgot to check the actual method of unlocking, and there was none. The guy on the Chinese forum did not reveal any details about how the unlock method works, let alone a step-by-step guide of how to do so. At this point I already had the phone on hand, so i decided to search around in case there are other places with clues on how to unlock the device and install modified firmware.
The Not-So-Techy Unlock Process, and learn some Russian
The phone actually comes with an OEM unlock switch in developer options. However, if you try to run fastboot flashing unlock or fastboot oem unlock or anything about unlocking to the phone after turning this on, it will just report that the functionality is not implemented, with an embarassing Chinglish spelling error. Normally I would give up at this point, but since it is from a questionable manufaturer (Qin is not part of Xiaomi, but more like an ODM), my gut feeling told me that there must be some vulnerabilities, either in the kernel or in the firmwares, that we can make use of for at least an apparent unlock.
This first piece of clue came from a Russian forum, 4PDA. As you may know, I am from China, which is not the same as Russia, which means I could not understand even a word in Russian. But after some exhaustive google-fu, I just could not find any other pages about the phone, except all those articles that talks about nothing but the specifications. Seriously, what's the point of writing a "review" when it's just the specifications?
That aside, it seemed to me that I had to somehow try to find pieces of information from that forum. There is a post on 4PDA that serves as a central topic for the Qin 2 (Pro) device. Using Google Translate, I quickly noticed a guy claiming that he could unlock the device, but again, without detailed information. Later in that thread, the same guy posted an rar archive named Android_device_unlock.rar, which is definitely very appealing. Sadly, when I clicked to download the file, I just ended up with a 404 error.
You would not believe me how much time I wasted by assuming the link was broken, but I did. I just looked over that post and tried to find further information, but people there just seemed to suddenly begin talking about making "pac" ROMs, and on how to remove those Chinese apps, never revisiting the unlocking topic again.
At some point it came to me that maybe the link was not broken after all. Maybe it is just showing 404 because I am visiting the forum as a guest, not a registered account. With the help of Google Translate, I stumbled through the registration process, finally blocked by the CAPTCHA at the end that required knowledge of Russian. I do have some Russian friends, but I did not feel like bothering them for stupid reasons, so I tried to learn to read the CAPTCHA. Fortunately, I was able to find some pretty comprehensive guides on the CAPTCHA on 4PDA. It turned out to be some Russian numerals, and this guide listed all possible numerals in Russian that may appear in the CAPTCHA. I just had to use my pattern-matching "brain power" to read the thousands, the hundreds, the tens and finally the ones, rewrite it as normal digits, and voi-la, the system accepted my registration.
After passing the CAPTCHA and logging in, the file was finally available for download. The archive contained a fastboot Linux ELF executable, a shell script, a rsa4096_vbmeta.pem which looked suspiciously like a private key, a signidentifier_unlockbootloader.sh, and a start.sh, with the rest as some documentations in Chinese that we do not really need. Presumably start.sh was supposed to automate the unlock process, but somehow it would not work on my machine. Fortunately, I was able to figure out the correct way to unlock, using information from that script.
It turned out that the phone was indeed locked, and the unique token of the device must be signed with a designated private key to facilitate the unlock process. The token can be fetched by ./fastboot oem get_identifier_token with the device in fastboot mode (adb reboot bootloader). Note that you must use the executable from the archive, since my normal fastboot binary did not work when running this command. I think there are some vendor-specific modifications to the fastboot protocol. After the command is executed, the output would look like the following
...
Identifier token:
XXXXXXXXXXXXXXXXXXXXXXXXXXXX
OKAY [  0.017s]
finished. total time: 0.017s
The XXXXXXXXX part is the token we need. Something to note is that on my device, the XXXXX part was broken into two separate lines, and it has to be concatenated to one line without any line break or space in order to form a complete token (this was also learned from several trial-and-errors). Now you can execute
./signidentifier_unlockbootloader.sh ${TOKEN} rsa4096_vbmeta.pem signature.bin
with ${TOKEN} replaced with your actual token retrieved from the last step, which generates a signature.bin that the bootloader understands. Then,
./fastboot flashing unlock_bootloader signature.bin
will send the signature to the device and unlock the bootloader. The bootloader will prompt for confirmation on the device, and you have to press the volume down button to unlock.
After some waiting, now you will be greeted with an expensive paperweight. This was exactly what the guy who published the unlock files was talking about, which was not translated into something that made sense to me at first. I understood it with the help of my Russian friends (finally), and it seemed that you have to use the ResearchDownload tool to re-install the firmware to bring it back to life after unlocking. I assume the bootloader was not really designed for unlock-ability, so maybe it wiped something it should not wipe when erasing userdata.
There are a lot of guides on how to use ResearchDownload, the tool to flash Spreadtrum devices, so I am not going to repeat every possible detail here. Basically, you just fire up the tool after installing Spreadtrum drivers, press the first button, choose the "pac" ROM file, wait for it to load (note: you might want to disable EraseUBOOT and EraseUBOOTLOG here via the settings icon in case anything breaks during re-flashing UBOOT and bricking the phone, but this is optional and if nothing fails you are always fine), then press the "double arrow" button, after which you restart your phone while holding the "volume up" button (on the "normal" Qin 2 non-pro it is presumably the AI button, which is the button besides the red power button). The flashing process will now begin and you can release the volume button.
Our nice Russian friends on 4PDA privided a link to the pac version of firmware 1.1.0 for Qin 2 Pro. Earlier in the thread, the same guy who published the unlock files also published links for firmwares of the normal Qin 2, with a link to the ResearchDownload tool and drivers in the same post.
When the firmware is re-flashed, everything started to work just fine. The system boots, and in developer options it shows that the phone is now unlocked. But now I started to understand why people on 4PDA just do not talk about this "unlock" -- the bootloader, in its unlocked state, only allows flashing signed images. Anything not matching the original signature will fail to load and get stuck in infinite waiting. At least, now I can actually use the fastboot flash command, instead of the ResearchDownload software that is notoriously inconvenient and runs only on Windows, though I still could not actually flash anything without official signature.
Flashing
Now it's time to figure out how to actually flash anything to the Qin 2 Pro. The first thing I tried, obviously, is just using the ResearchDownload software to install unsigned images (replacing the ones that comes with "pac"). And obviously, this does not work. It fails with the same symptoms as when trying to flash over fastboot -- just stuck with infinite waiting.
The guy on 4PDA actually had some working non-official ROMs on Qin 2 non-pro, but none was available for Qin 2 Pro, and the available ones were in pac format. Wondering how he managed to make them, I downloaded his packages along with the "original" ones, and tried to compare them to find something. Again obviously, I could not find anything useful. How did I assume that I could manually compare through all the binary files?
Skimming through the thread again and again, and I finally noticed the same guy saying something about avbtool and somehow it may enable flashing even without unlocking. I came to realize that maybe this is indeed something about AVB, or Android Verified Boot, a secure boot scheme used by Android. Since the bootloader seems to verify the flashed images against "something", it must be pulling the whitelisted public keys from somewhere. It is either hardcoded, or loaded somewhere else that can be overwritten. If it were hardcoded, then this is game over, but since someone was able to make non-official ROMs for Qin 2, this means that at least it should be overwritable. If I were to implement anything like such a bootloader, where would I store the public keys? Well, when AVB already implements such a thing called vbmeta, why would I reinvent the wheel? If it pulls whitelisted public keys from vbmeta, then surely it can be overwritten.
But how would one overwrite vbmeta? Android is not stupid enough to leave such a hole in the system that vbmeta itself isn't signed. As per documentation, vbmeta itself is, obviously, protected by another key, which is then hardcoded into the bootloader itself. It's like when you configure Secure Boot on normal PCs, where the UEFI firmware verifies the bootloader against a limited set of keys, and the bootloader in turn verifies the OSes with a possibly larger set of keys. Maybe the bootloader on our device does not verify vbmeta at all? I tried to modify some content of the original vbmeta image, and ran fastboot flash vbmeta vbmeta.img, but it still ended up with the same infinite wait.
At this point, I was pretty out of hope. But something quickly struck my mind when I was wandering around on YouTube for nothing -- I remember I have seen something with vbmeta in its name. It was the private key file from the previous Android_device_unlock.rar used to unlock the device. The name rsa4096_vbmeta.pem is now very suspicious -- the bootloader accepted unlock token sigend by this key, and this key has vbmeta in its name. Maybe this is exactly what I was looking for -- a key that can sign a modified vbmeta image?
I set out to use the avbtool command that comes with AOSP to generate an empty vbmeta with the disabled flag, while specifying this rsa4096_vbmeta.pem as the key.
avbtool make_vbmeta_image --key Android_device_unlock/rsa4096_vbmeta.pem --algorithm SHA256_RSA4096 --flag 2 --output vbmeta_my.img
and tried to flash this vbmeta_my.img. And.... it did not work.
But I so firmly believed the rsa4096_vbmeta.pem was the right key that I ran avbtool verify_image against the official vbmeta.img (you can find one by unpacking the "pac" firmware from 4PDA; details on how to unpack can be Googled) with this key specified, and they did match. This told me that there must be something else I was missing that made the bootloader reject my image.
Calming my self down, I first tried to inspect the original vbmeta image by avbtool info_image. This gave me a bunch of output
Minimum libavb version:   1.0
Header Block:             256 bytes
Authentication Block:     576 bytes
Auxiliary Block:          13504 bytes
Algorithm:                SHA256_RSA4096
Rollback Index:           0
Flags:                    0
Release String:           'avbtool 1.1.0'
Descriptors:
    Chain Partition descriptor:
      Partition Name:          boot
      Rollback Index Location: 1
      Public key (sha1):       ea410c1b46cdb2e40e526880ff383f083bd615d5
    Chain Partition descriptor:
      Partition Name:          system
      Rollback Index Location: 3
      Public key (sha1):       e2c66ff8a1d787d7bf898711187bff150f691d27
    Chain Partition descriptor:
      Partition Name:          vendor
      Rollback Index Location: 4
      Public key (sha1):       9885bf5bf909e5208dfd42abaf51ad9b104ee117
    Chain Partition descriptor:
      Partition Name:          product
      Rollback Index Location: 10
      Public key (sha1):       766a95798206f6e980e42414e3cb658617c27daf
    Chain Partition descriptor:
      Partition Name:          dtbo
      Rollback Index Location: 9
      Public key (sha1):       ea410c1b46cdb2e40e526880ff383f083bd615d5
    Chain Partition descriptor:
      Partition Name:          recovery
      Rollback Index Location: 2
      Public key (sha1):       d9093b9a181bdb5731b44d60a9f850dc724e2874
    Chain Partition descriptor:
      Partition Name:          l_modem
      Rollback Index Location: 5
      Public key (sha1):       e93e7d91ba1a46b81a5f15129b4dc5769bf41f26
    Chain Partition descriptor:
      Partition Name:          l_ldsp
      Rollback Index Location: 6
      Public key (sha1):       e93e7d91ba1a46b81a5f15129b4dc5769bf41f26
    Chain Partition descriptor:
      Partition Name:          l_gdsp
      Rollback Index Location: 7
      Public key (sha1):       e93e7d91ba1a46b81a5f15129b4dc5769bf41f26
    Chain Partition descriptor:
      Partition Name:          pm_sys
      Rollback Index Location: 8
      Public key (sha1):       e93e7d91ba1a46b81a5f15129b4dc5769bf41f26
    Chain Partition descriptor:
      Partition Name:          dtb
      Rollback Index Location: 11
      Public key (sha1):       ea410c1b46cdb2e40e526880ff383f083bd615d5
which is certainly not empty. What if the bootloader was checking if all the partitions are present? (spoiler: this is not the reason) I decided then to first try to recreate the original vbmeta.img.
To recreate it, I need to specify the public keys themselves, not just sha1 values. I guessed that the public keys themselves must be in the vbmeta file, so I tried to use a hex editor to open the file. Quickly, I found something interesting

The boot part is obviously the name of the partition, but what follows? There is no other purpose of vbmeta than to specify the keys (or hashes) for the partitions, so I just assumed this was the key and copied everything from the header 00 00 10 00 (which looks like some length or the e value used in RSA cryptography) to the next 00. I put them in a file called keys/key_boot.bin, and re-ran the avbtool command with the boot partition added with its own key
avbtool make_vbmeta_image --key Android_device_unlock/rsa4096_vbmeta.pem --algorithm SHA256_RSA4096 --flag 2 --chain_partition boot:1:keys/key_boot.bin --output vbmeta_my.img
(note the 1 part in boot:1:blahblah is from Rollback Index Location)
I then inspected the generated vbmeta again, and to my surprise, it actually showed up with the same hash for boot as the original one. I then repeated the process for all the partitions, after which I ended up with a command like
avbtool make_vbmeta_image --key Android_device_unlock/rsa4096_vbmeta.pem --algorithm SHA256_RSA4096 --flag 2 --chain_partition boot:1:keys/key_boot.bin chain_partition system:3:keys/key_system.bin --chain_partition vendor:4:keys/key_vendor.bin --chain_partition product:10:keys/key_product.bin --chain_partition dtbo:9:keys/key_dtbo.bin --chain_partition recovery:2:keys/key_system.bin --chain_partition l_modem:5:keys/key_l_modem.bin --chain_partition l_ldsp:6:keys/key_l_ldsp.bin --chain_partition l_gdsp:7:keys/key_l_gdsp.bin --chain_partition pm_sys:8:keys/key_pm_sys.bin --chain_partition dtb:11:keys/key_dtb.bin --output vbmeta_my.img
flashing this vbmeta image, it worked. I then tried to generate my own RSA private key with openssl and use avbtool extract_public_key against my own private key to get a pub.bin, and then replaced some of the original keys with my pub.bin. Then it stopped getting accepted by the bootloader.
I started to question my assumptions about this, but did not completely give up. See, my own vbmeta.img was only a few KBs in size, while the official one is 1 MB, there must be some discrepancies here. I then compared my image and the official one binary-wise, and quickly discovered that the official one has a bunch of padding after the end of seemingly a block of data, before which the two were completely the same. At the end of the 0-padding string (and also the end of the entire file), there was a seemingly random string, but the first two bytes were readable ASCII characters: DHTB. I searched for this "magic" value and indeed found something about this -- it was some sort of checksum placed at the end of images, used by Samsung and Spreadtrum. There is even a tool called dhtbsign which signs a boot image, but it does not work with my vbmeta images. I decided to YOLO it and tried a sha256sum of my own generated vbmeta.img, and it was different from the one after DHTB. But what if there was some sort of padding? The dhtbsign repository indicated the presence of padding for boot images, so why couldn't there be one for vbmeta?
There is a string 00 40 00 00 right after the DHTB part and what looked like a sha256 checksum. Interpreting it as a Little Endian integer, it is 16384, which I guessed was the length of the file including the padding. I tried to add --padding_size 16384 to the avbtool command that generated the vbmeta image, and ended up with an image exactly 16384 bytes. Running sha256sum again, this time the checksum matches exactly with the one after DHTB.
Now it all makes sense. If the bootloader requires a checksum, then surely a modified one without the checksum would not pass. I quickly came up with a python script to convert a padded vbmeta.img to one with DHTB
import hashlib
import sys

f = open(sys.argv[1], "rb")

b = f.read()

sha = hashlib.sha256(b).digest()

f.close()
f = open("vbmeta_signed.img", "wb")
f.write(b)

f.seek(1048576 - 512)

f.write(b'\x44\x48\x54\x42\x01\x00\x00\x00')
f.write(sha)
f.write(b'\x00\x00\x00\x00\x00\x00\x00\x00\x00\x40\x00\x00')
f.seek(1048576 - 1)
f.write(b'\x00')
f.close()
This computes the SHA256 checksum and writes it to the position where I found DHTB in the original image. Running my own image through this script and flashing it to the device.... This time it finally works.
I then checked if I could still flash the boot image signed by the original keys, and it surely failed. I then tried to re-sign the boot image with my own private key
avbtool add_hash_footer --image boot.img --partition_name boot --partition_size 36700160 --key my_private_key.pem --algorithm SHA256_RSA4096
(36700160 is the length of the original file while SHA256_RSA4096 is what avbtool info_image shows)
Now this re-sigend image is flashable through fastboot. I have, finally, successfully flashed something on to this device.
I am not posting my modified vbmeta.img because it only works with my own private key. Since this post was never ment to be a guide that even a newbie can follow, please generate your own vbmeta against your own private keys. If I were ever to post my own Recoveries or ROMs, I will then upload my version so that people can just flash it without re-signing.
Installing GSI (Generic System Image)
Now here comes the part where I doubt whether my efforts were even meaningful, because I flash a GSI successfully without ANY sort of signature. I just downloaded phh's GSI and ran
fastboot -S 100M system system.img
fastboot erase userdata
(-S 100M is needed due to data too large error, erase is because format does not work).
it succeeded without any error. Maybe I should try this right after I unlocked the bootloader -- maybe the bootloader just does not check the signature of system.img whatsoever? Maybe my entire effort of hacking vbmeta.img was in vain. Or maybe this is exactly caused by my vbmeta.img, because I have added the disabled flag, but it DID check the signature of boot.img. For now, this does not make any sense to me, but I do not care anyway. I can at least use fastboot flash to install my custom boot / recovery images after all.
I rebooted the phone, and the Android boot animation showed up, but it got stuck because fastboot erase userdata left data partition in an unformatted state. Since there is no usable recovery, I had to use adb shell (phh's GSI allows this by default; very useful on a device like this) to run mkfs.ext4 on the userdata partition. (This is NOT meant to be a comprehensive guide, so please find out how to format userdata yourself.) I force-rebooted the phone again, and it then booted into phh's GSI successfully, with most of the features working.
For now I have only tested phh's GSI 9.0. I plan to start working on porting recoveries and (possibly) device-specific ROMs for fun after my final exams. However, I am not entirely sure, due to the fact that it is VERY tedious to debug anything on this phone. The boot-to-recovery hotkey does not work unless the phone is turned completely off before booting, but when the system is messed up, you cannot actually turn it off except rebooting. The only options left would be to crack the phone open and disconnect the battery (which is not hard with just nails but tedious) or to flash official ROM via ResearchDownload, reboot via adb, and start all over again.
Update 2020-01-01: I was able to get phh's GSI 10.0 running though a few patches might be needed. I will send PR to phh after I finish my exams. I will also see if I could simplify the unlock process so more people would be able to do it.
Update 2020-01-03: Unfortunately I was not able to actually run TWRP on this device. Somehow the whole thing crashes soon after the first splash screen, and without a working ramoops (the one included on this device was pretty much non-functional), I have little clue how to even debug this thing. adb was not able to start, and it seemed that even the init process crashed at some point.
Update 2020-01-09: For Qin 2 Pro, you will need arm64-ab (treble_arm64_XXX) variant of phh GSI; For the "normal" Qin 2, you will need arm32_binder64-ab (treble_a64_XXX).