
2026年7月2日星期四 at 17:08
July 2, 2026•1,249 words
How to Turn Any Photo Into a Stunning Spiral Art Design with Spiral Betty
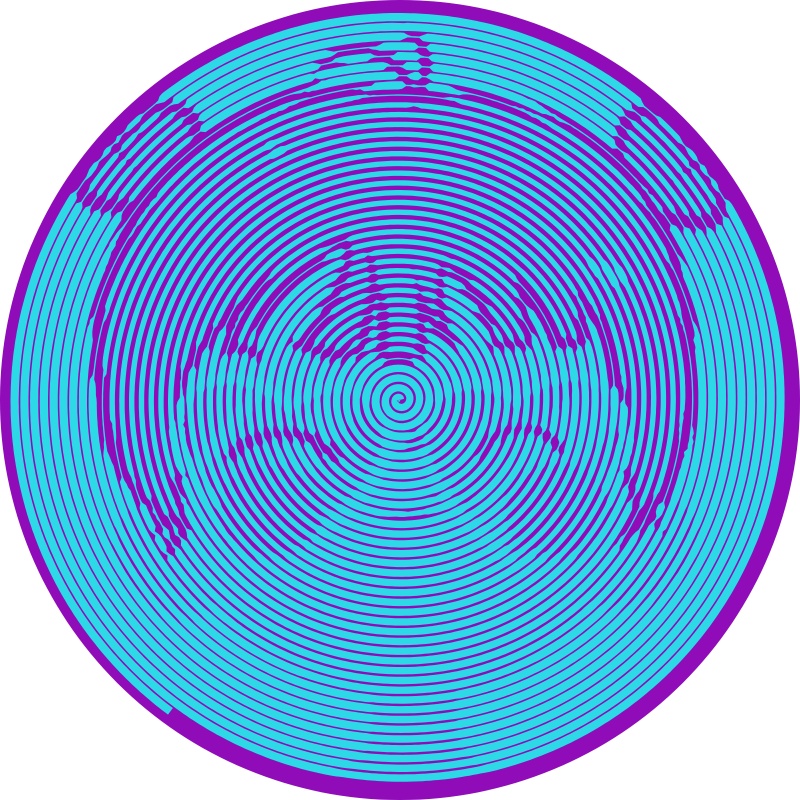
In this tutorial, I'll show you how to transform your favorite photos into mesmerizing spiral art that you can use for vinyl decals, wall art, t-shirts, and more — all in just a few clicks.
I love discovering tools that make creative projects both easy and impressive. And Spiral Betty is one of those hidden gems that does exactly that.
Have you heard of it? Check it out at spiral betty.
It's a free online tool that turns any image into a spiral pattern. Unlike the original spiralbetty.com (which has been down for a while), spiralbetty.net is fully functional, fast, and completely free to use. The result is a single continuous spiral path that creates a stunning optical illusion of your photo — perfect for crafting projects without the headache of complex weeding.
I first tried it with a photo of my dog, and the result blew me away. The spiral effect looks intricate and artistic, but because it's essentially one continuous line, it's surprisingly easy to work with for vinyl cutting projects.
Let me walk you through the entire process step by step.
Materials You'll Need
Vinyl Sheets — I recommend using flat vinyl sheets rather than rolled vinyl. Rolled vinyl tends to have air bubbles underneath, which can cause your blade to snag on the intricate spiral cuts. Sheet vinyl sits flatter and gives much cleaner results.
HTV (Heat Transfer Vinyl) — If you're making t-shirts or fabric projects, HTV works great. Use sheets that are at least 10 inches wide for best results.
Cutting Machine — I use a Cricut, but any cutting machine that can handle SVG files will work.
Computer with Internet — To access spiralbetty.net and generate your spiral designs.
Step 1: Prepare Your Photo
For the best spiral results, start with a clear photo that has good contrast between the subject and background.
Pro tip: Remove the background first. You can use any free background removal tool (like Remove.bg or Photopea) to isolate your subject on a white or transparent background. This gives the cleanest spiral output because the tool can focus on the subject without background distractions.
Save your edited photo as a JPG or PNG file.
Step 2: Upload to Spiral Betty
Go to spiralbetty.net — the interface is clean and simple.
- Click the upload area and select your photo.
- The tool will instantly generate a spiral preview of your image.
You can adjust several settings to perfect your design:
- Ring Size — Controls how many spiral rings wrap around your image. More rings = more detail but also more intricate cutting. For smaller projects, use fewer rings.
- Scale — Zooms in or out on your subject within the spiral.
- Lightness — Adjusts the overall brightness of the spiral effect.
- Contrast — Changes the thickness of the black and white spiral bands. Higher contrast creates bolder, more defined lines.
I recommend sticking with black and white for the highest contrast. This makes the cutting process much cleaner when you upload to your cutting machine software.
Once you're happy with the result, click Download to save your spiral image as a PNG file.
Step 3: Upload to Cricut Design Space
Now let's get this ready for cutting.
- Open Cricut Design Space and click Upload.
- Select your downloaded spiral image.
- When prompted, choose Complex as the image type — this preserves all the fine spiral details.
- Use the Background Remover tool to erase any remaining white background. Since the spiral image is mostly black lines on white, one click on the background usually removes it all at once.
- Select Cut Image and save to your library.
Step 4: Size and Cut
Important sizing tip: Don't resize your spiral design below 8 inches in diameter. Anything smaller becomes extremely intricate and difficult to cut cleanly without snagging. For best results, aim for 10 inches or larger.
- Place your vinyl sheet on a Light Grip Mat.
- Load into your Cricut and cut as usual.
Step 5: Weeding Made Easy
Here's the magic of Spiral Betty — because the design is essentially one continuous spiral path, weeding is incredibly simple compared to traditional photo vinyl projects.
My weeding technique:
- Leave the vinyl on the mat while weeding.
- Start from the outer edge and work inward.
- If your spiral lines are very thin, try reverse weeding (weed from the inside out) to avoid lifting the wrong pieces.
Project Ideas for Your Spiral Art
Once you've mastered the basic spiral, here are some creative ways to use it:
1. Vinyl Decals
Apply to laptops, water bottles, car windows, or phone cases. The spiral effect catches light beautifully and always gets compliments.
2. Wall Art
Cut a large spiral from black vinyl and apply to a white canvas or directly to the wall. It looks like a high-end art piece but costs almost nothing to make.
3. T-Shirts & Apparel
Use HTV to press your spiral design onto t-shirts, tote bags, or hoodies. The single-line design makes for smooth, comfortable wear.
4. Custom Frames
Combine your spiral with shaped frames (hearts, circles, Mickey ears) for themed projects. Upload both the spiral and frame SVG to Cricut, align them, and attach before cutting.
5. Gifts
Spiral art of family photos, pets, or special memories makes incredibly personal and unique gifts. I've made them for birthdays, anniversaries, and Mother's Day — always a hit.
Troubleshooting Tips
| Problem | Solution |
|---|---|
| Spiral lines tearing during cut | Use heat transfer vinyl instead of adhesive vinyl; it cuts cleaner |
| Blade snagging on intricate parts | Switch to a fresh fine-point blade and use sheet vinyl |
| Weeded design looks like a black circle | You weeded the wrong part — try reverse weeding and leave a tab to guide you |
| Image not clear in spiral | Increase contrast and use a photo with strong subject/background separation |
| Download not working | Make sure you're using spiralbetty.net — the original spiralbetty.com is no longer active |
Why I Prefer SpiralBetty.net
I've tried several spiral image generators, and here's why spiralbetty stands out:
- Completely free — No hidden fees or watermarks
- No signup required — Just upload and go
- Fast processing — Results appear instantly
- Clean interface — No ads cluttering the workspace
- Reliable — The original site went down, but this one is actively maintained
Whether you're a seasoned Cricut user or just getting started with vinyl projects, Spiral Betty is one of those tools that makes you look like a design pro with minimal effort.
Ready to Try It?
Head over to spiralbetty.net and upload your first photo. I guarantee you'll be amazed by how a simple spiral transform can turn an ordinary picture into a piece of art.
Have you made a Spiral Betty project? I'd love to see what you create! Share your results or ask questions in the comments below.
Related Projects You Might Enjoy:
- How to Layer Vinyl for Multi-Color Designs
- Beginner's Guide to Cricut Heat Transfer Vinyl
- 10 Photo Gift Ideas You Can Make in Under an Hour
Happy crafting!